Friday, November 4, 2016
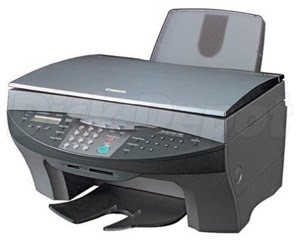
Canon Smartbase MP700 Waste Tank Full
Canon Smartbase MP700 Waste Tank Full

Resetting the Waste Ink Volume Counter
1) Enter SERVICE MODE.---
By pressing [Menu] then [Copy] then [#]
2) Select TEST MODE. (using + or - keys)
3) Press the [OK] key.
3) Press the [8] key. (TEST MODE)
4) Press the [3] key.
5) Press the [0] key. (INK COUNT).
6) Press the [OK] key.
7) Press the [Stop/Reset] key
9) Press the [ON/OFF]
------------------------Or-------------------------------
Open the cover printer, let the heads position themselves in the middle and then switch off the printer.
I then gently pushed the heads over to the left hand side. WIth a torch you can then see the ink tankson the RHS. It is two small padssitting within a black rubber surround. One is rectangular and the other is square. They are black and covered in ink.!! With small hands some delicate maneouvres and some patience you can just lift them (the pads -solid white blocks when washed) out with some tweezers or similar, wash them, dry them out and put them back. That is the easy way!
If you cant or if you drop one of them then the only other way i have found is a partial dismantling of the machine.Make sure you have the time and a clear head!
a)lift cover
b) remove pin from white bracket so lid tilts further back. The metal brackets will pop out.
c) remove plastic cover on rHS by removing two screws at front
d) remove screws retaining circuit board on Right hand side (be careful to reconnect any stray wires when it goes back together)
e) under the circuit board you find a screw retaining the top and the bottom of the printer together. Remove it.
f) on LHS with lid open you will also find a screw joining top and bottom as well as two screws at the back of printer (cant remember if you need to remove the plastic housing on the rear of the printer to find these screws??). Remove the two screw holding th top and bottom half together. Then the top half of the printer can be tilted back.Before you tilt it back Return circuit board to approximate position, metal brackets into slot, rejoin white hinge and close the lid ;Careful with wires.
g) then you have full access to teh printer waste ink tank. Remove pads, wash and reassemble!!
Good luck
Go to link Download
Subscribe to:
Post Comments (Atom)
No comments:
Post a Comment
Note: Only a member of this blog may post a comment.